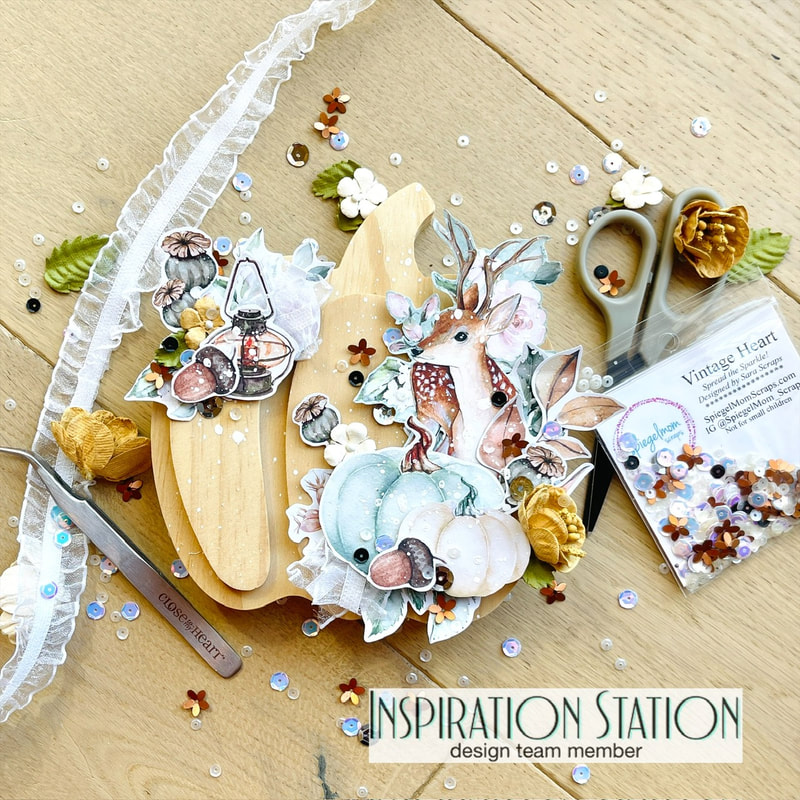
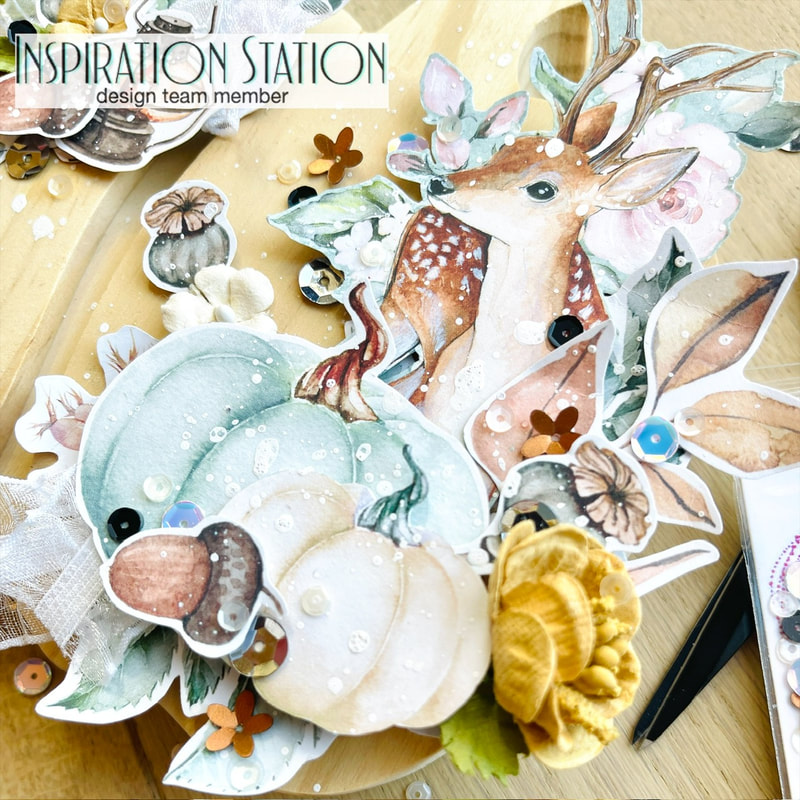
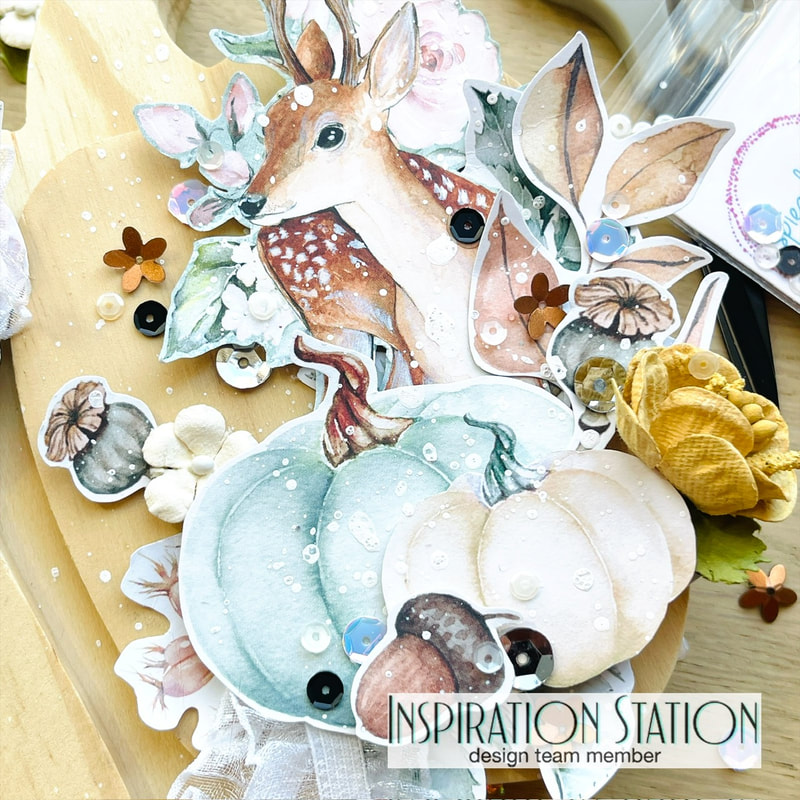
 I'm back today with my project for the Inspiration Station, where you create a project based on the inspiration pic and enter it for your chance to win a prize! This is the inspiration pic for this month:  After seeing this pic I decided to go pumpkin (surprise I know!)!!! I grabbed this little wooden pumpkin that I had waiting to have it's own project and the Old Manor collection from Mintay and got to work. I knew right away I wanted to use this deer with pumpkins towards it's legs so I fussy cut some out of the cards included with the collection. I then attached to the pumpkin using foam tape and glue. 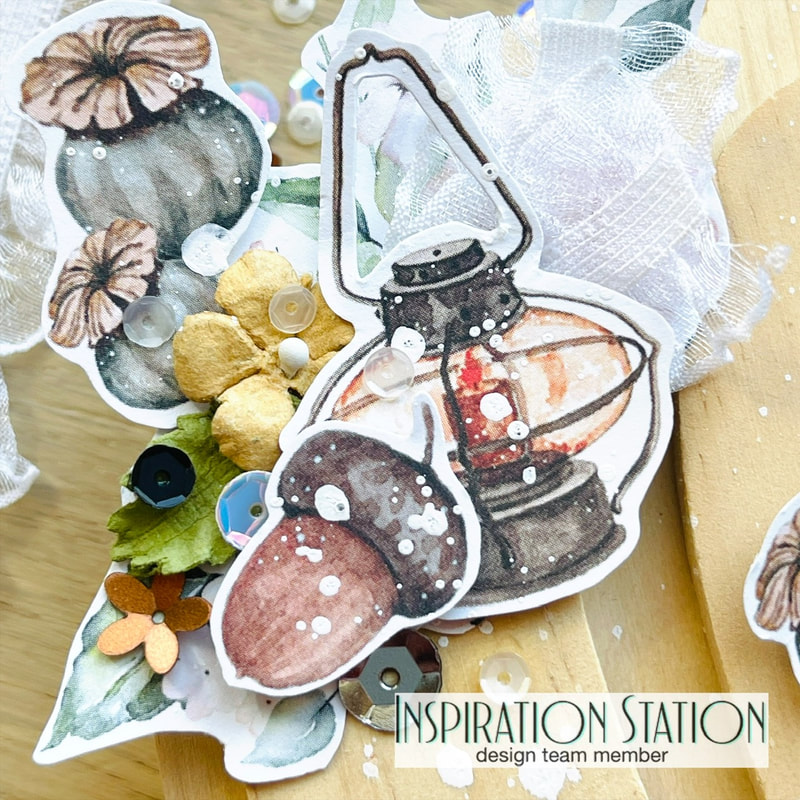 Then I wanted to add another little cluster up here in the left corner of my pumpkin so I decided to add some florals and a lantern. 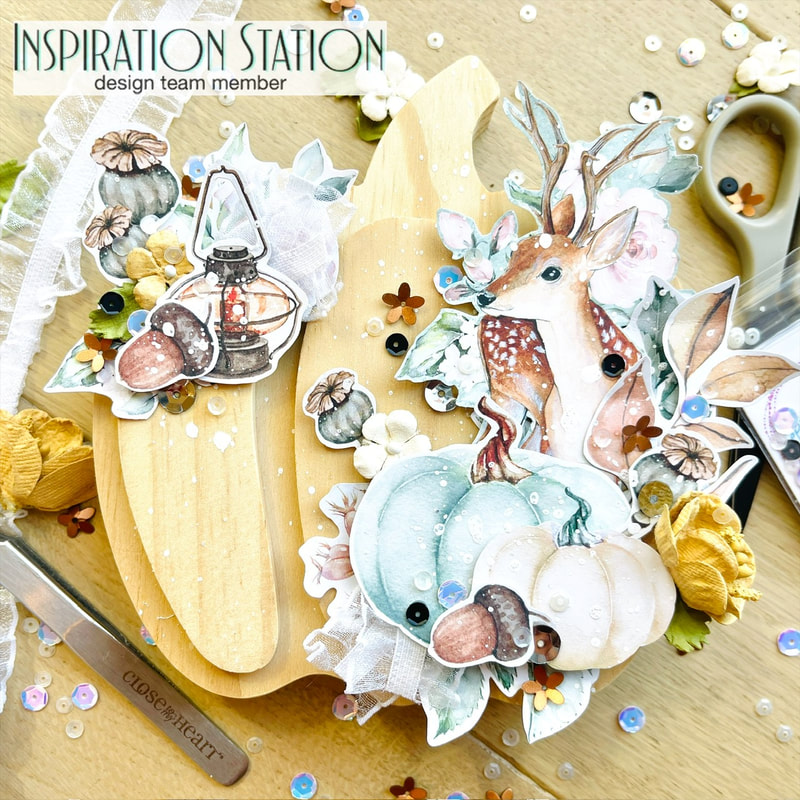 To finish off my pumpkin I added some Vintage Heart sequins from SpiegelMom Scraps, ribbon, white splatters and some beautiful flowers from 49 & Market.
Thanks so much for stopping in today to read about my pumpkin! Don't forget to check out everyone else's projects up on the Inspiration Station and enter your own for a chance to win a prize! I will see you back here next month for another project for Inspiration Station!
1 Comment
Donna L Walls
9/4/2023 04:52:22 am
Nicole, you've created yet another gorgeous piece. Thanks so much for your continued dedication to the Inspiration Station Challenge! Leave a Reply. |

Shaker ElementHello all! I am currently working on a mini album of a snow play trip we took in January. I wanted to put all kinds of different elements into it so I thought it would be a perfect time to add a shaker box. So first off I decided to use a snowflake cut file from The Cut Shoppe for this element and the first thing I did was cut some of the inside elements out to make the visible area bigger. Then I glued a piece of scrap page cover to the snowflake. I glued a bigger piece and once it was dry I then cut it down to just my shaker area. I then cut my foam dots in half to box it in.
So my snowflake is ready for my dodads! First I placed my snowflake on top of where I wanted it and took a mental note of where the shaker part would be. Then I placed a little pile of sequins and confetti where it will go.
I then pulled all those little backings off my foam dots and placed my snowflake where is supposed to go and viola, I had a beautiful little shaker snowflake! I hope you enjoyed this tutorial, please let me know in the comments if there is something you would like to learn for scrapbooking!
Archives
April 2023
Categories
All
|


 RSS Feed
