STAY COZY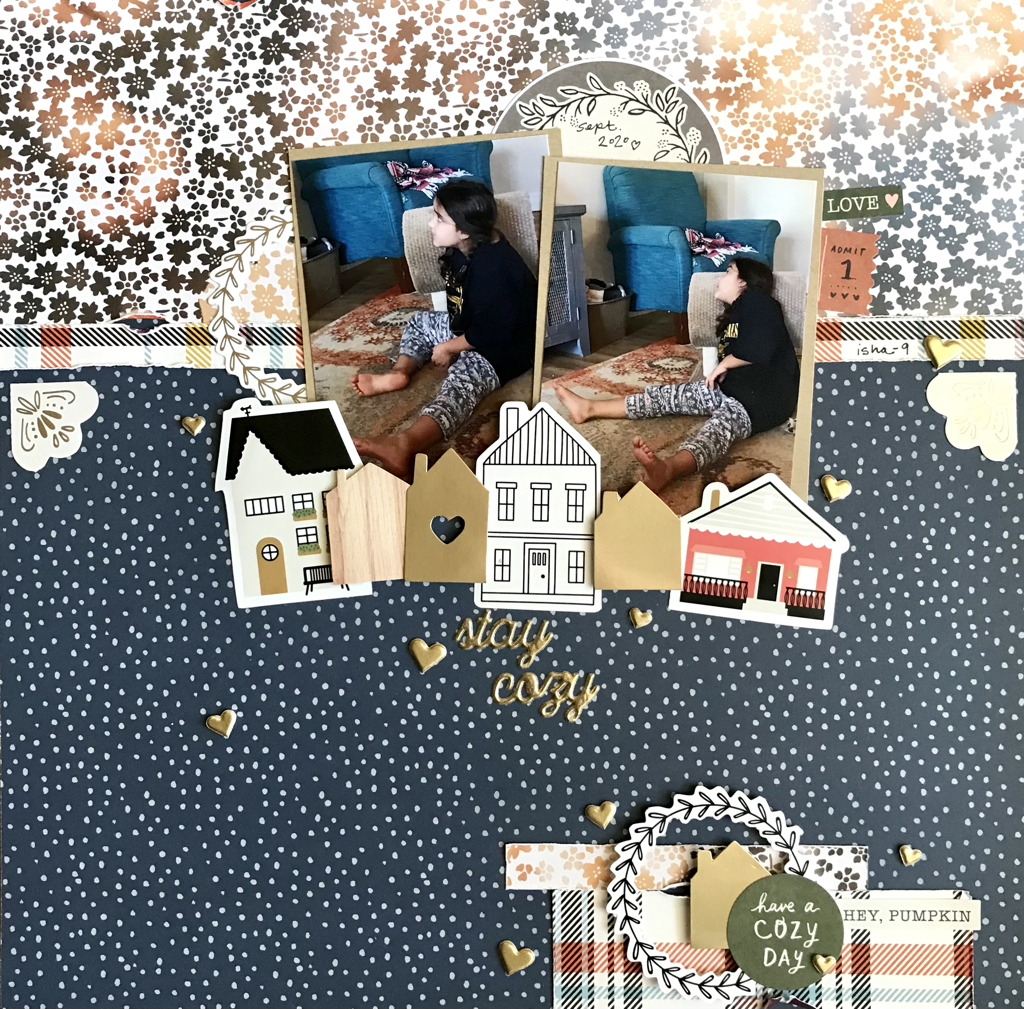 I created this layout for the Hip Kit Club weekly challenge. It features my youngest just lounging on the cat’s house while watching tv so obviously my title is “STAY COZY” 😂 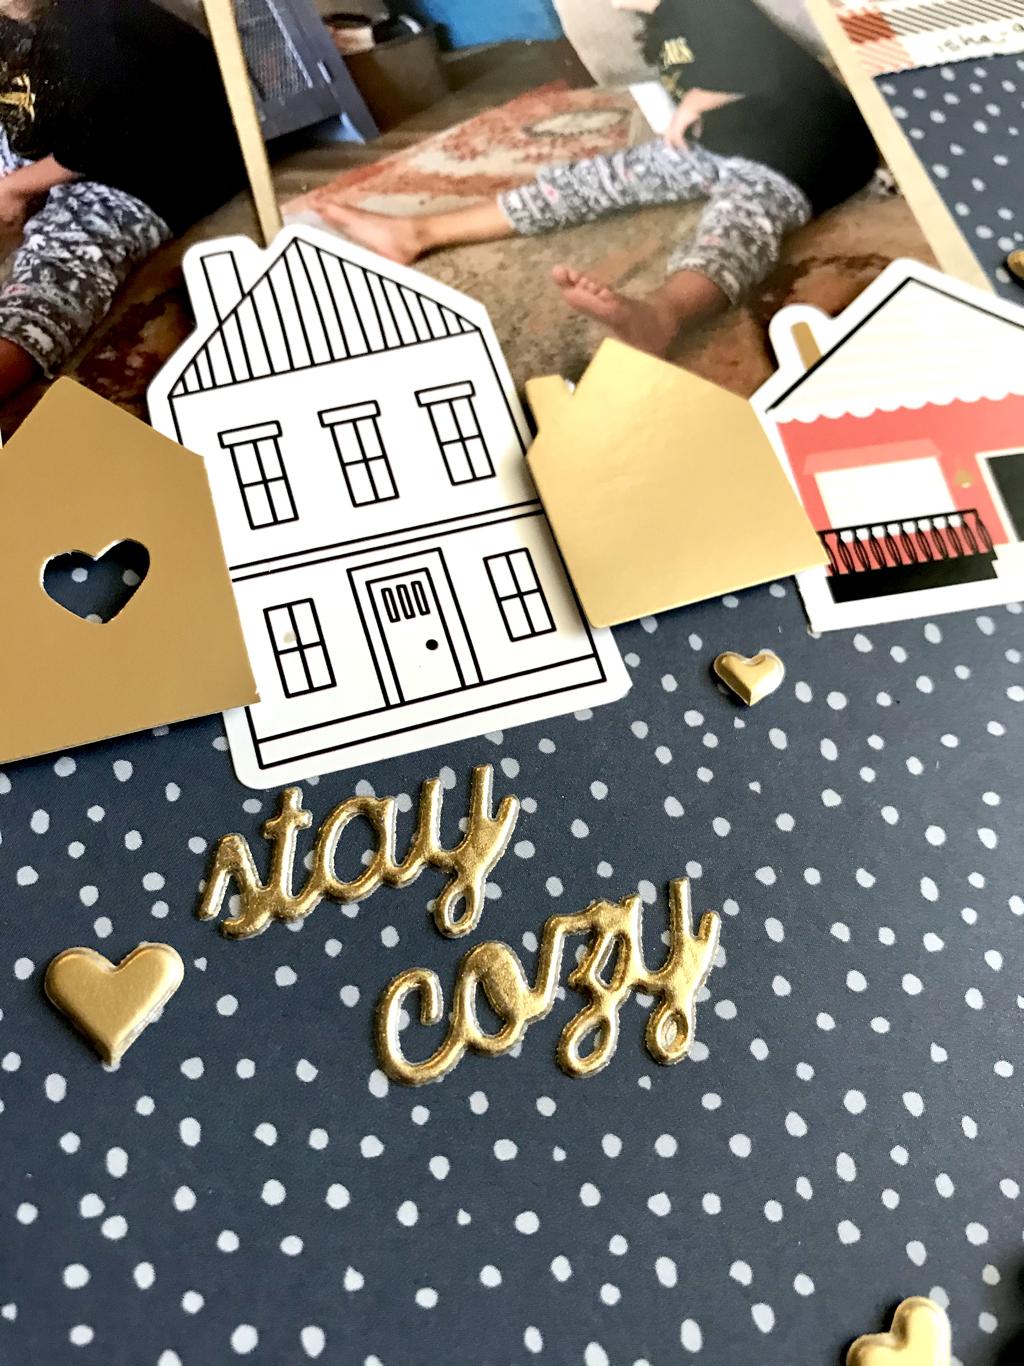 Since we are all comfy in our house here I decided to add little houses at the bottom of the pics. Along with some puffy hearts. 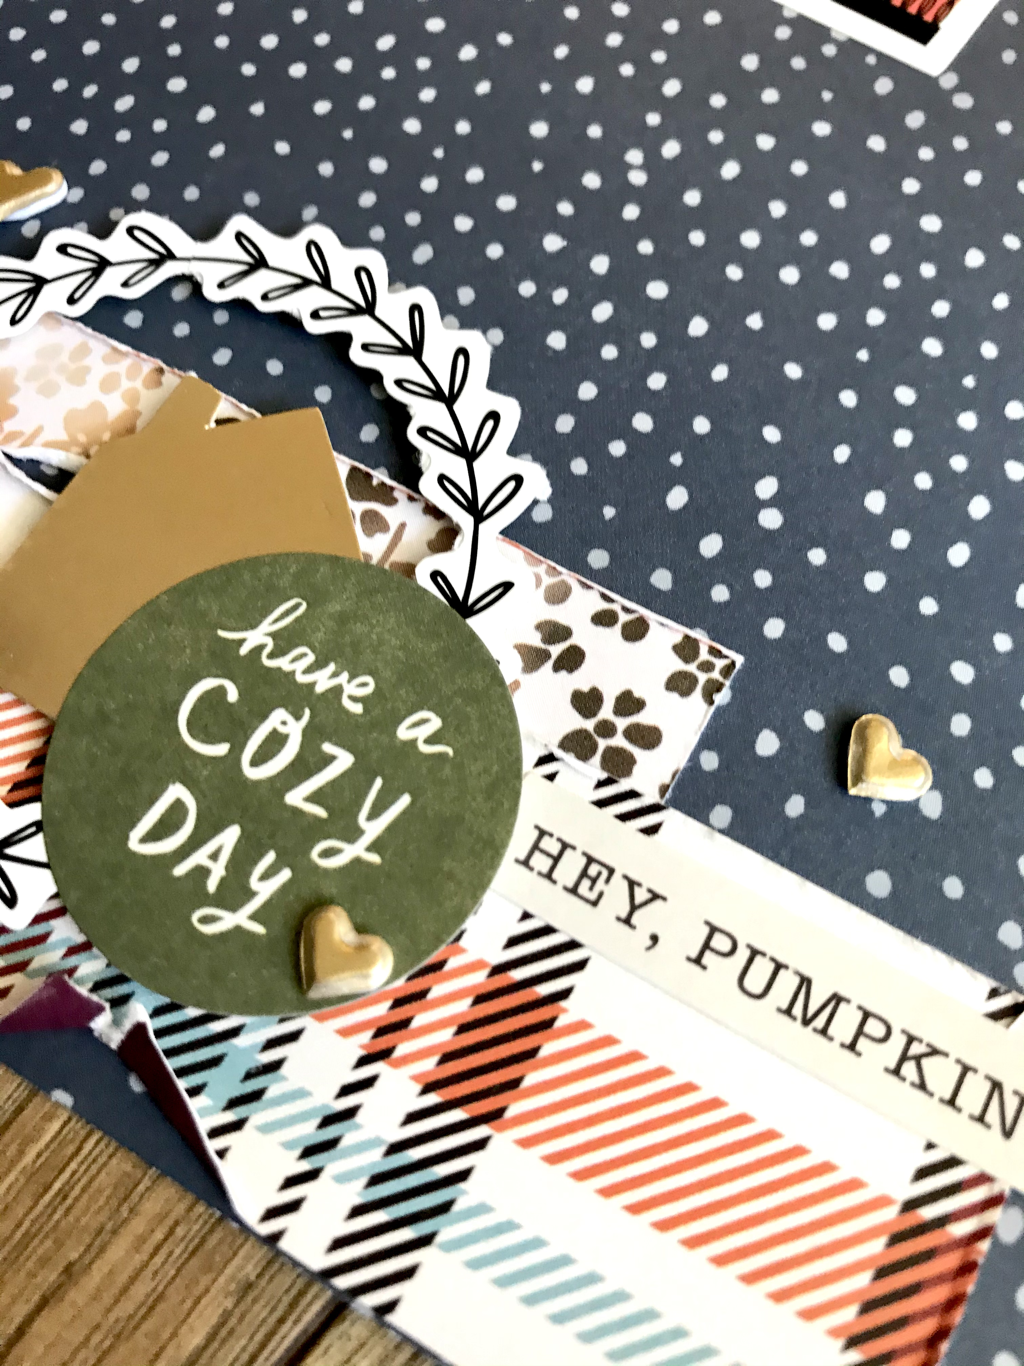 I added some of the same paper from the top, down here at the bottom, along with some fun ephemera and more puffy hearts! 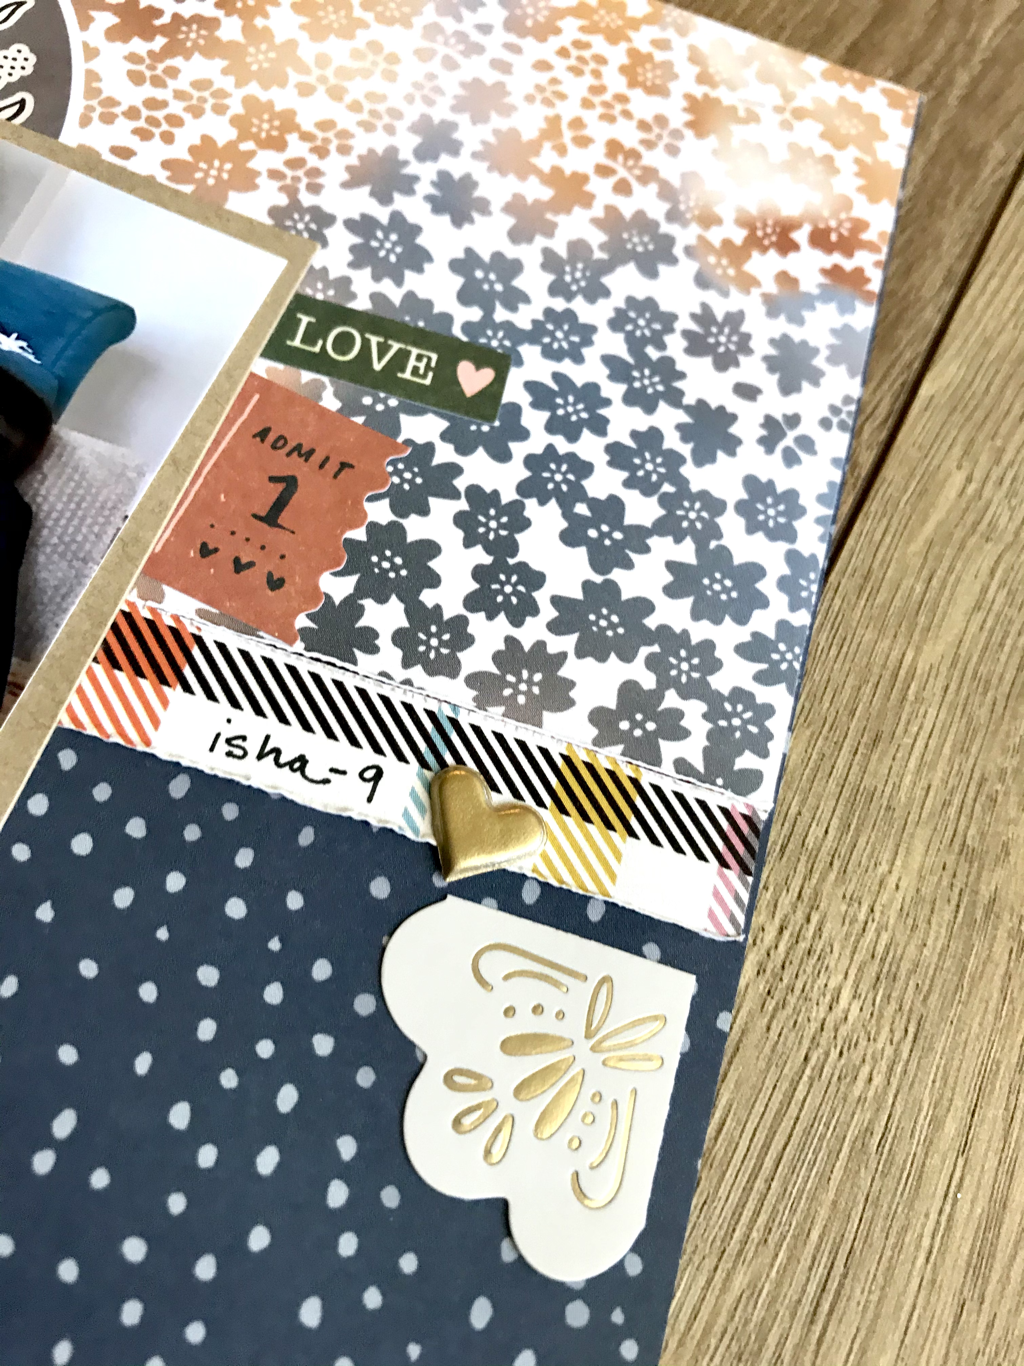 I also added a couple pieces of ephemera around the photos. And these little pieces at the upper corners of the background paper. That pretty much completes my page. Thank you for stopping by and reading my post, I appreciate you!
0 Comments
HANDSOME CAT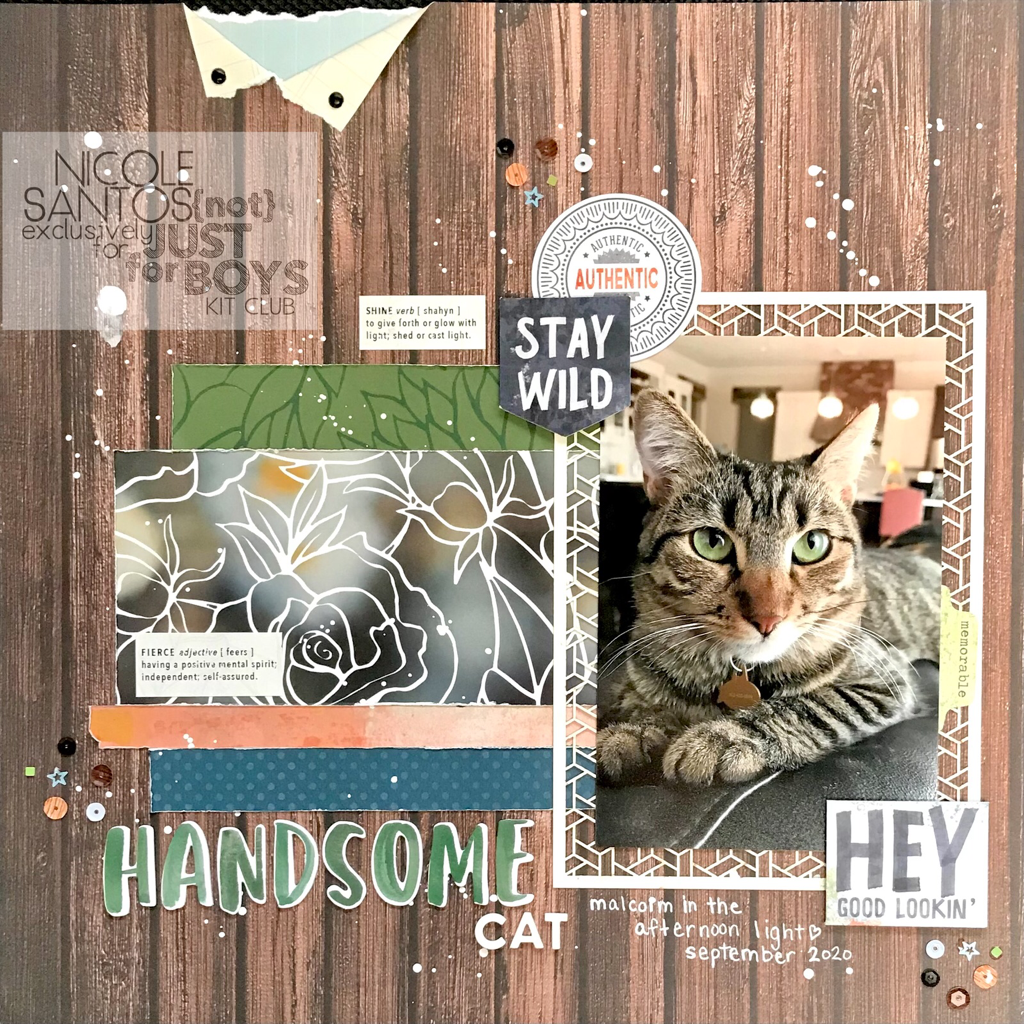 I absolutely love this picture of my handsome cat sitting in the afternoon light. I decided to pair it with my “COURAGEOUS” Premium Kit from {Not} Just for Boys Kit Club and use a sketch posted in the Scrapbook and Planner Fun Facebook group page. 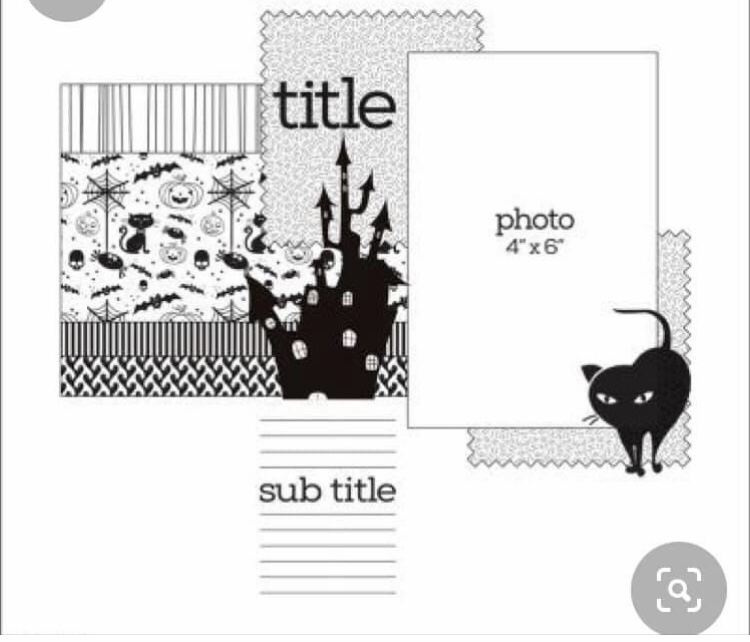 Here’s the sketch I started with. I decided to use the wood grain paper for my background, brought over the floral paper from last months “VIVID” Premium Kit because I love it so much, added the other strips of paper to compliment. I then put down this little precut piece from my kit by Heidi Swapp. 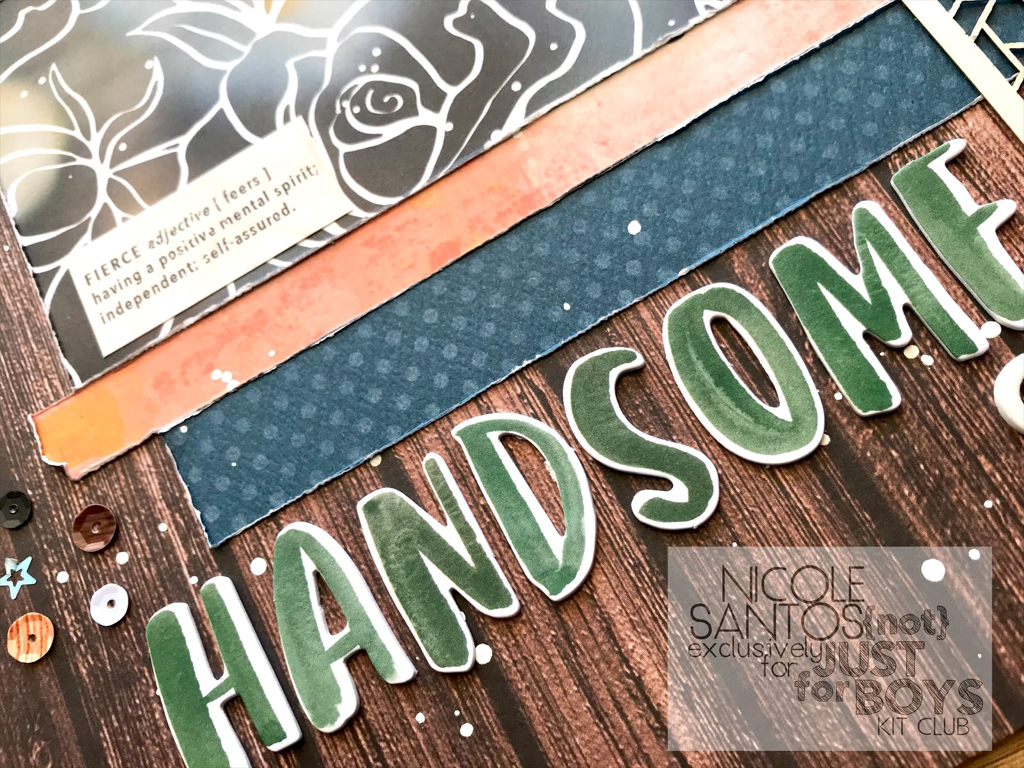 I used these fun alphas for the title along with letters from a previous kit. I splattered with watered down acrylic white paint cause I think little sprinkles on the page are so cute! 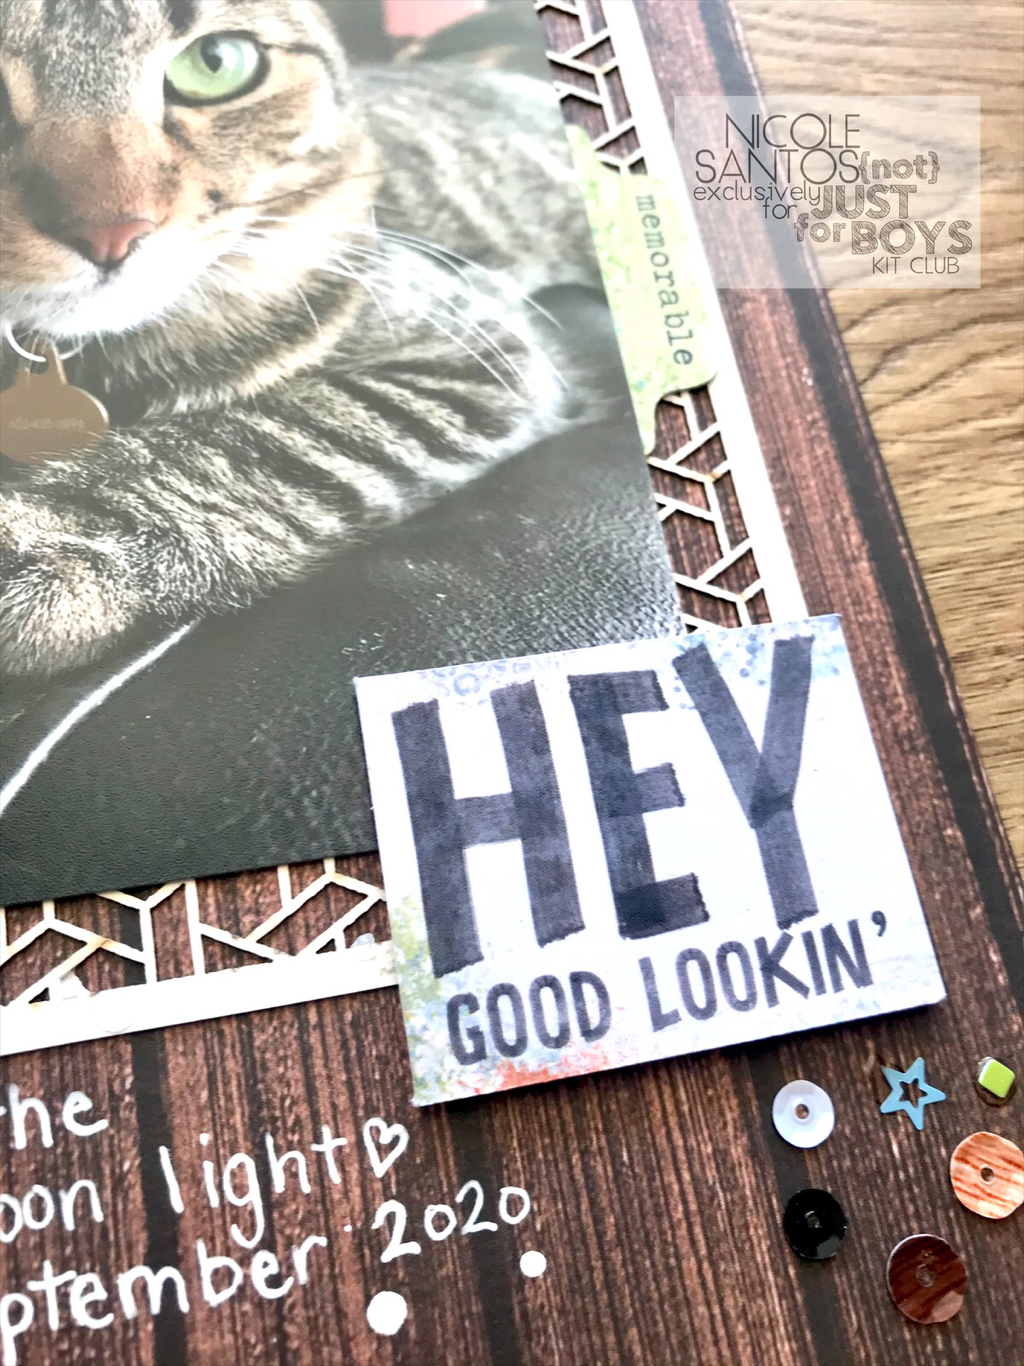 After adding my adorable picture, I finished with some Cocoa Vanilla ephemera from my kit, the Courageous sequins, and journaling.
I hope this inspires you to create something wonderful of your own. Thanks for stopping by my blog 😍 Heres’s a link to the {Not} Just for Boys Kit Club so you can check out their amazing products! HELLO BUBBLES Here is a very bubbly page about my sweet kitty, Malcolm, playing with bubbles. It features so many things from my stash it will be hard to keep it all straight! 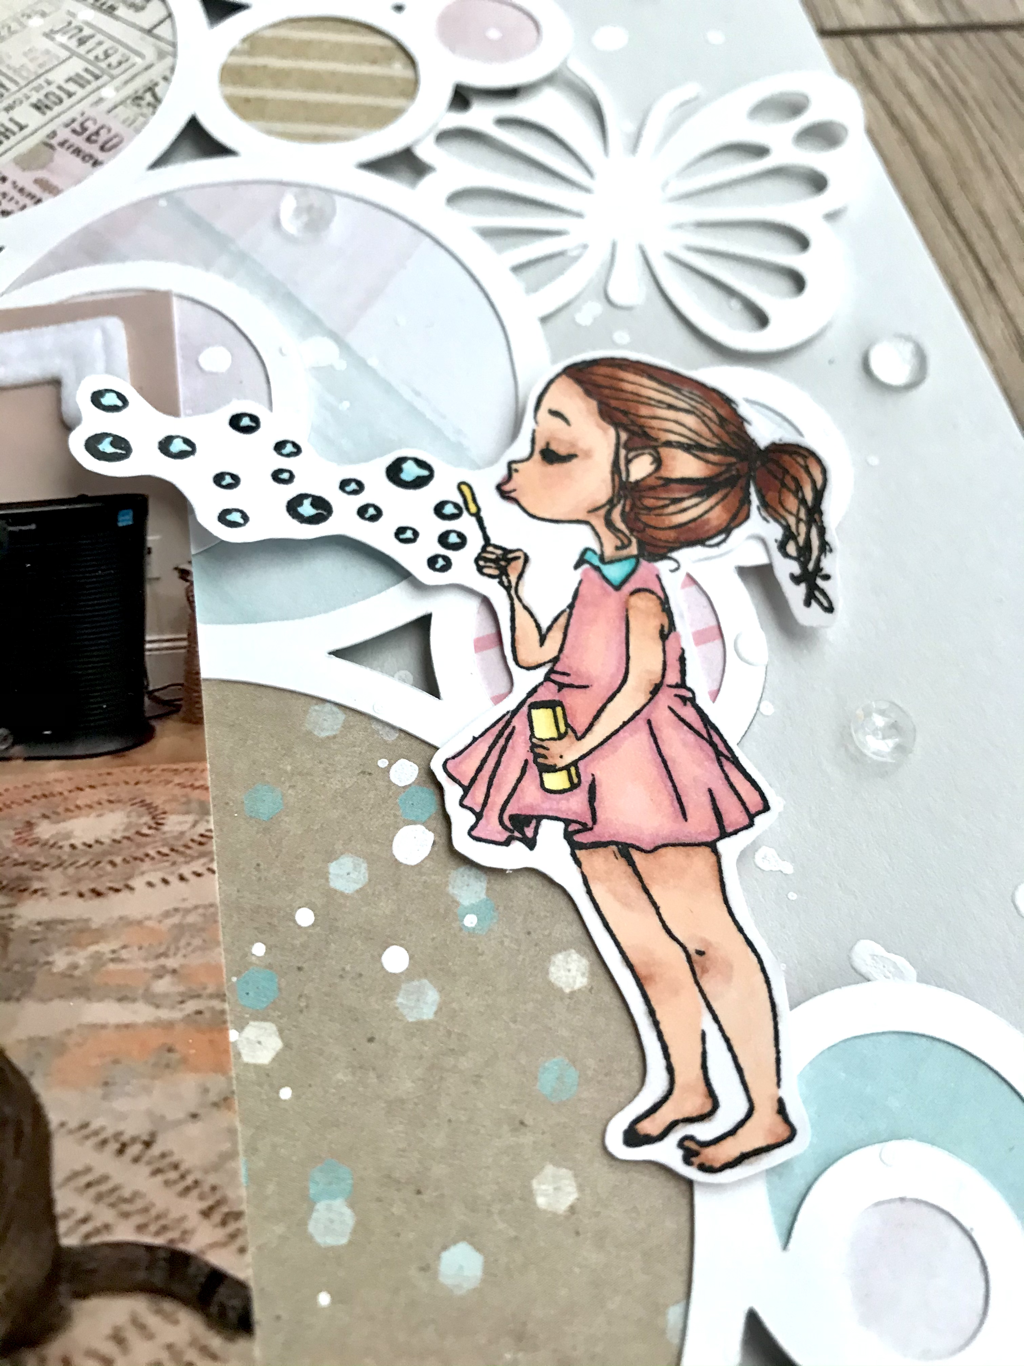 After grabbing this pic I decided to use my Picket Fence Studios Kylee Boo stamp set and color with copics. Then I grabbed my bubbly cut from Redefined Kreative to go with this too. I decided I wanted some light bright colors and went digging through my pocket cards (which I never use for pocket pages) to use them to back it. I popped it up on this very light Close To My Heart grey cardstock. Then I sprinkled with white splatters. 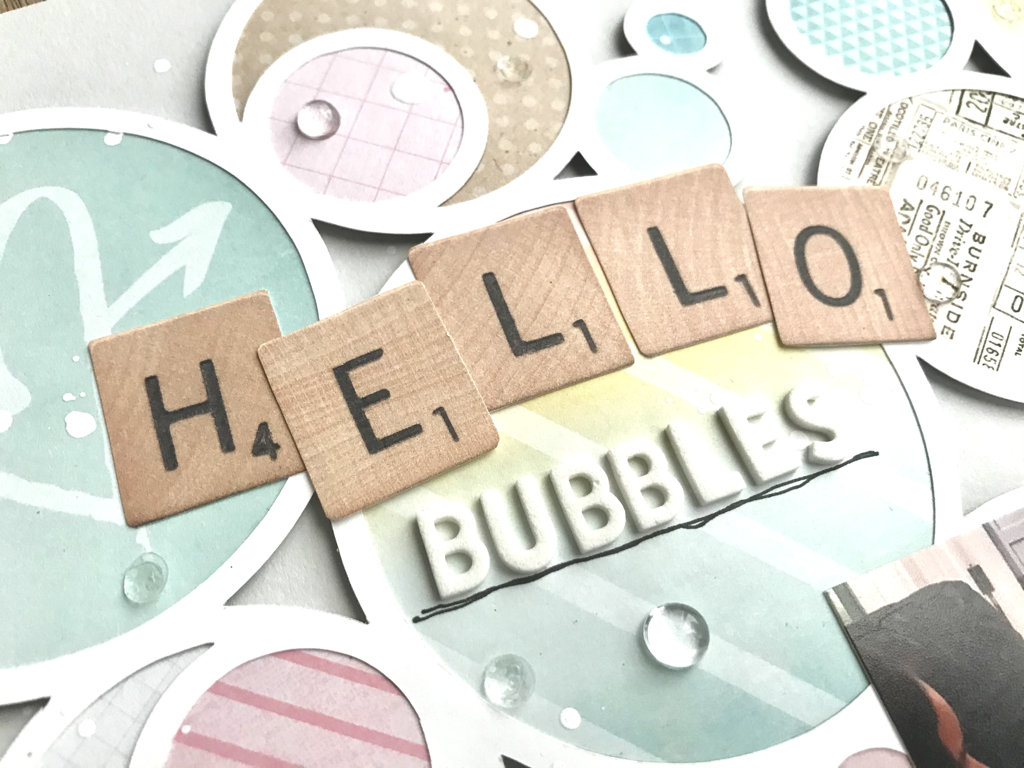 I added this title...the “HELLO” came from Redefined Kreative and the little, white letters came from {Not} Just for Boys Kit Club. I also added some little bubble and clear sequins. 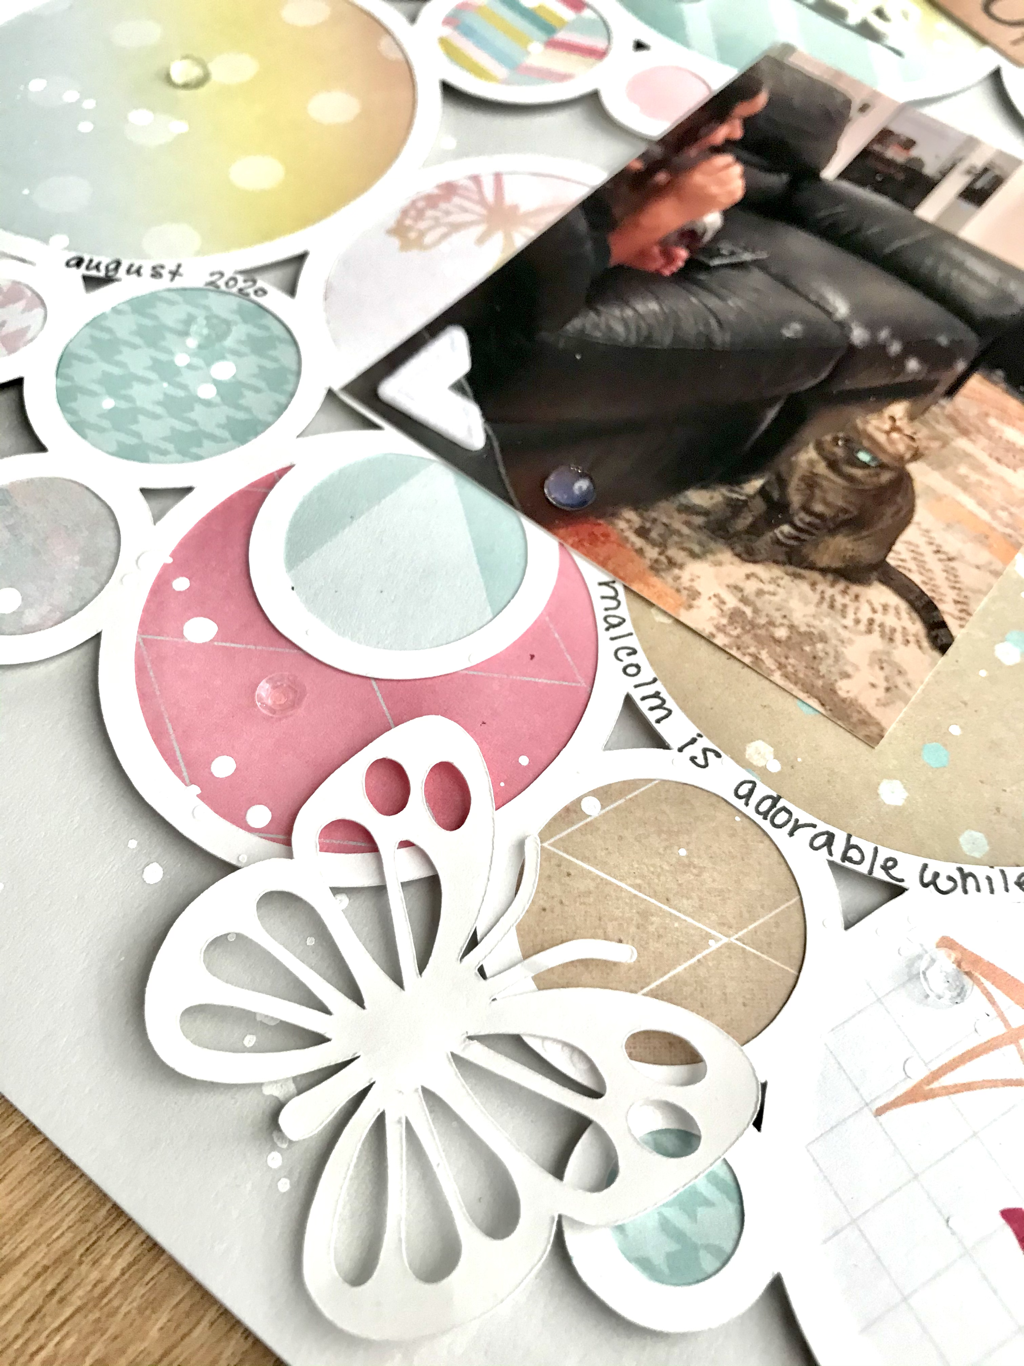 To finish this page I added some butterflies from a Hip Kit Club cutfile, journaling, and some white photo corners I got from Felicity Jane Studios.
Well I hoped you enjoyed reading about my process, thanks for stopping by! Please see links below for the wonderful business I used on this page! Picket Fence Studios Redefined Kreative Close To My Heart {Not} Just for Boys Kit Club Hip Kit Club Felicity Jane Studios {HALLOWEEN CARDS} USING THE “SPOOKY NIGHTS” DELUXE THEME KIT from {Not} Just for Boys Kit Club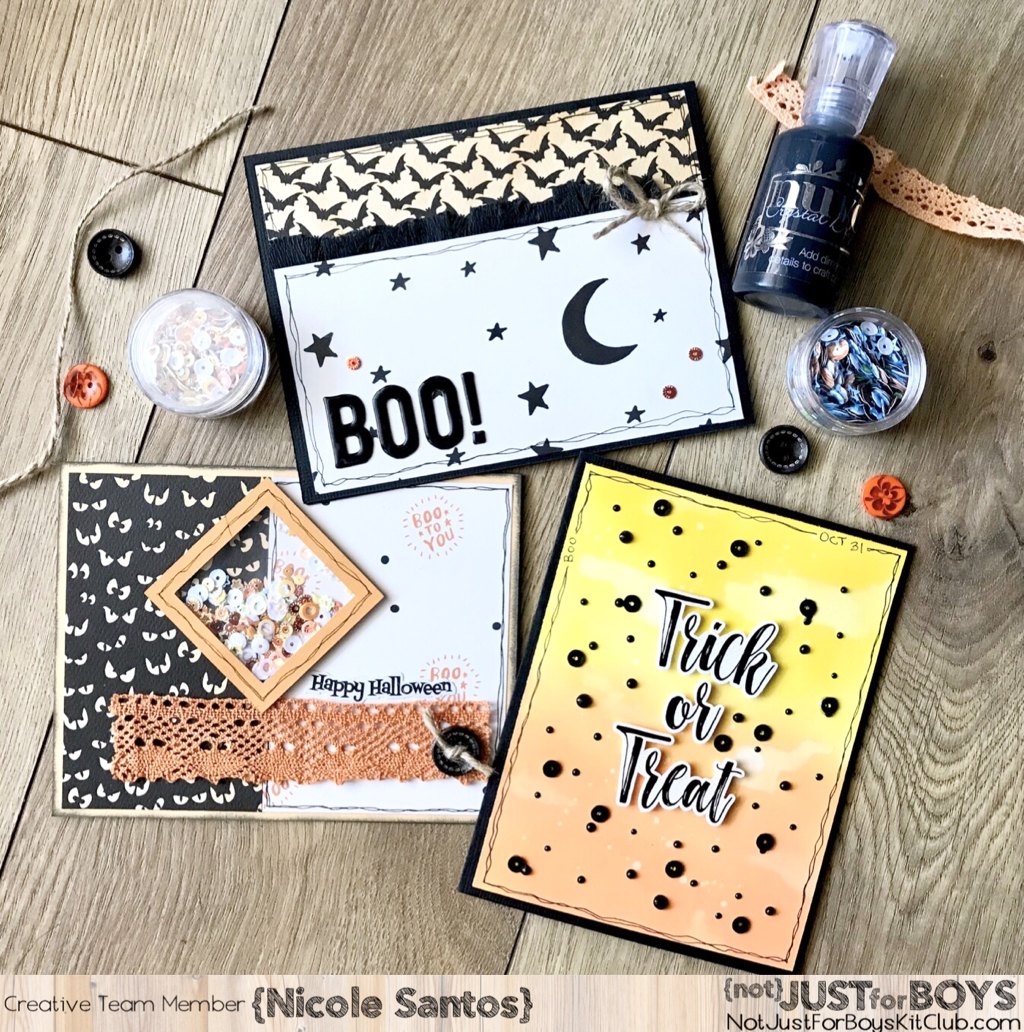 I created some cute little Halloween cards from my “SPOOKY NIGHTS” DELUXE THEME KIT from {Not} Just for Boys Kit Club. These were pretty simple to make and turned out super cute too! 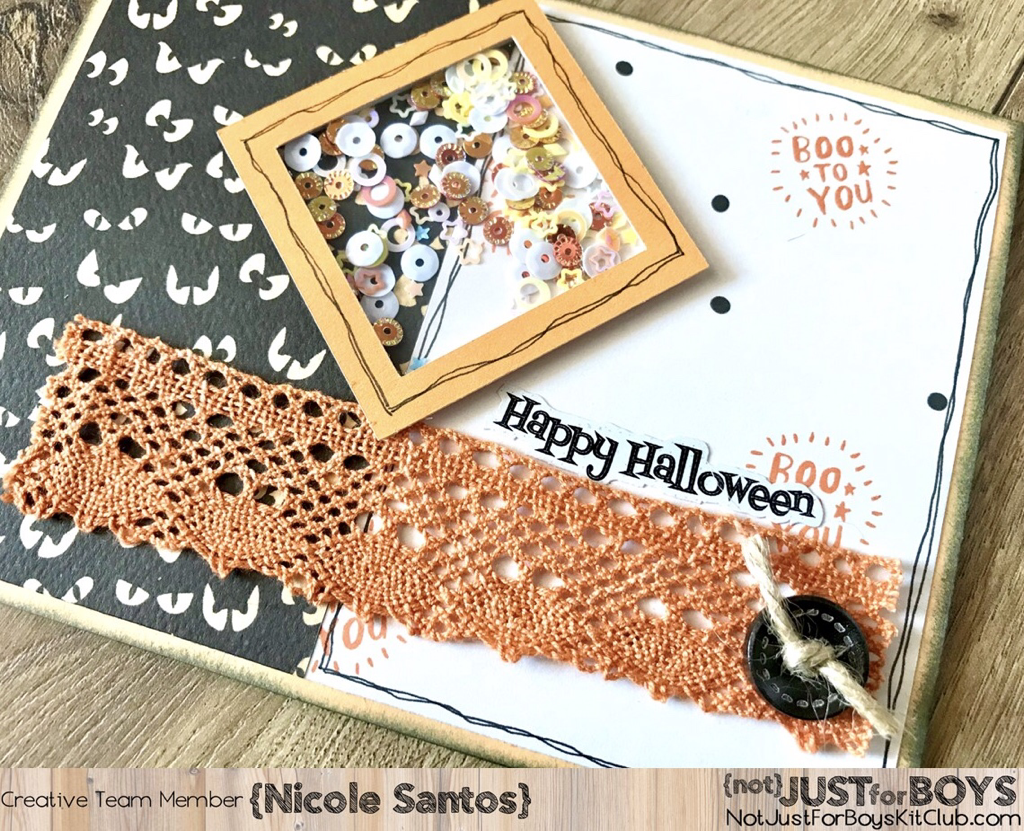 For this one I just used these cute patterned papers, lace ribbon, a button, and a simple shaker. 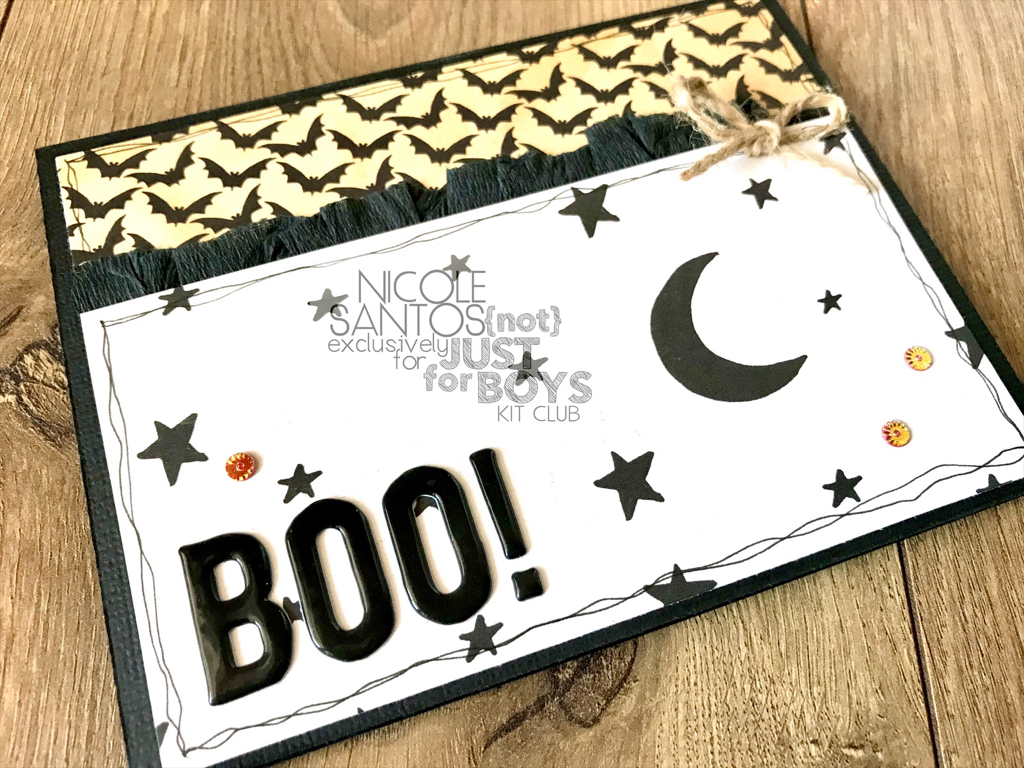 Here I used more patterned paper with some ruffled crape paper, a little bow, “BOO!”, and some sequins.  Here I used some distress oxides to make this background and finished with popped up stickers, black Nuevo drops, and black sequins.
Thank you so much for reading my post, I hope it inspires you to make some cute little cards yourself! Check out the {Not} Just for Boys Kit Club here for their awesome products: https://notjustforboyskitclub.com/ |

Shaker ElementHello all! I am currently working on a mini album of a snow play trip we took in January. I wanted to put all kinds of different elements into it so I thought it would be a perfect time to add a shaker box. So first off I decided to use a snowflake cut file from The Cut Shoppe for this element and the first thing I did was cut some of the inside elements out to make the visible area bigger. Then I glued a piece of scrap page cover to the snowflake. I glued a bigger piece and once it was dry I then cut it down to just my shaker area. I then cut my foam dots in half to box it in.
So my snowflake is ready for my dodads! First I placed my snowflake on top of where I wanted it and took a mental note of where the shaker part would be. Then I placed a little pile of sequins and confetti where it will go.
I then pulled all those little backings off my foam dots and placed my snowflake where is supposed to go and viola, I had a beautiful little shaker snowflake! I hope you enjoyed this tutorial, please let me know in the comments if there is something you would like to learn for scrapbooking!
Archives
April 2023
Categories
All
|


 RSS Feed
