HOPPY EASTER Hello friends! I have this fun Easter card to show you today featuring a fun cutfile from Craft Fix Designs using the Daisy Meadows collection from Close to my heart. I am also announcing that I have been chosen to be on the Craft Fix Designs design team. I haven’t officially started but I did create this card just for fun! 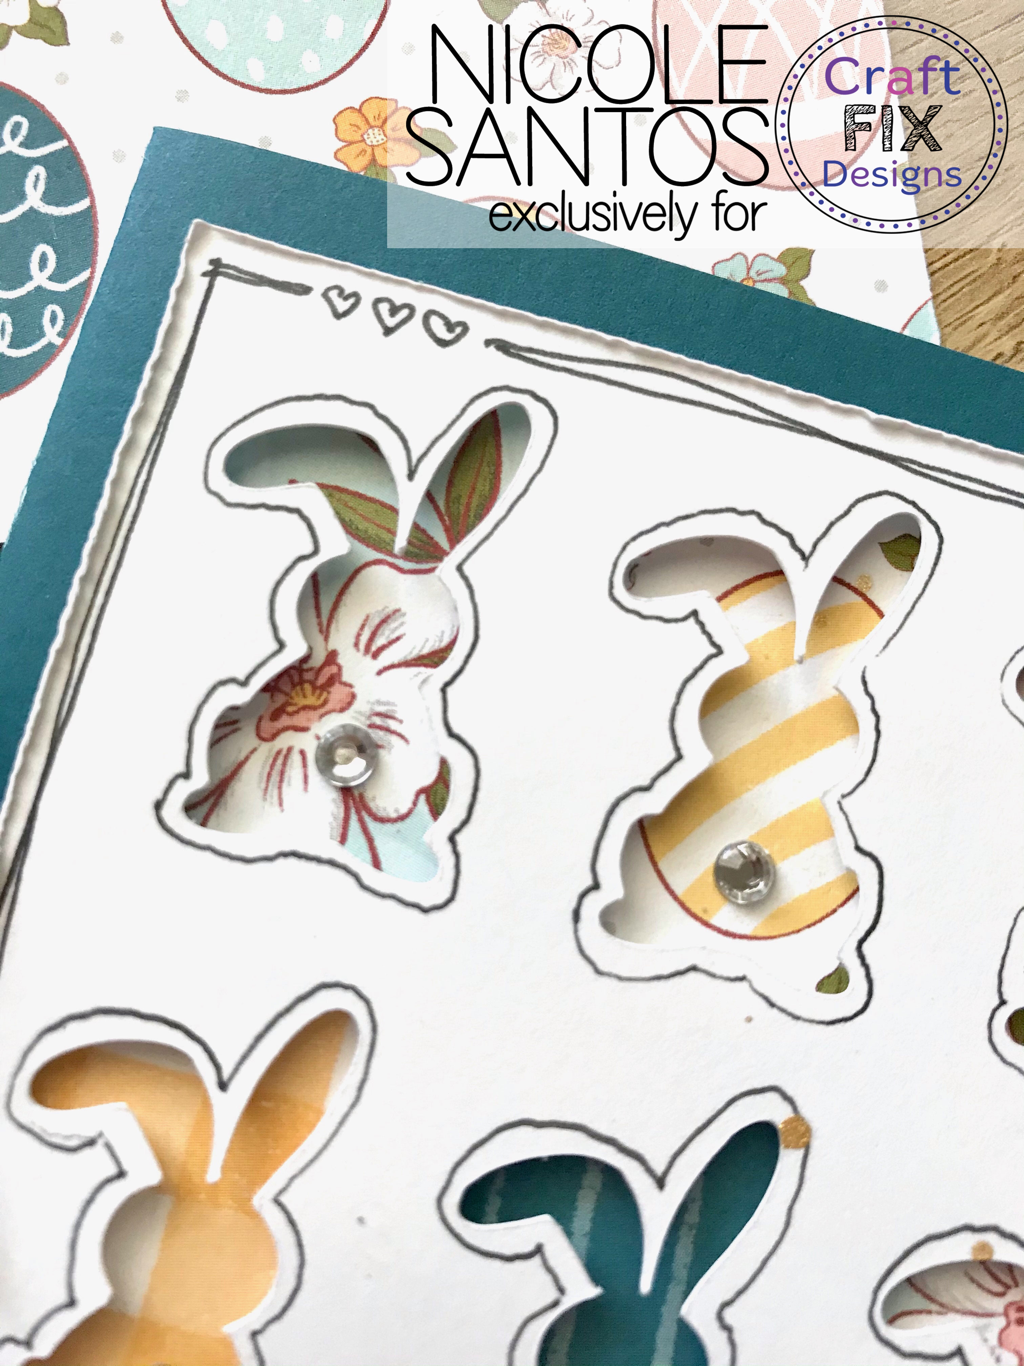 The first thing I did was cut out the bunny card from Craft Fix Designs and backed it using pop dots with patterned paper from Daisy Meadows. Then I used a little bling to make the bunny tails. 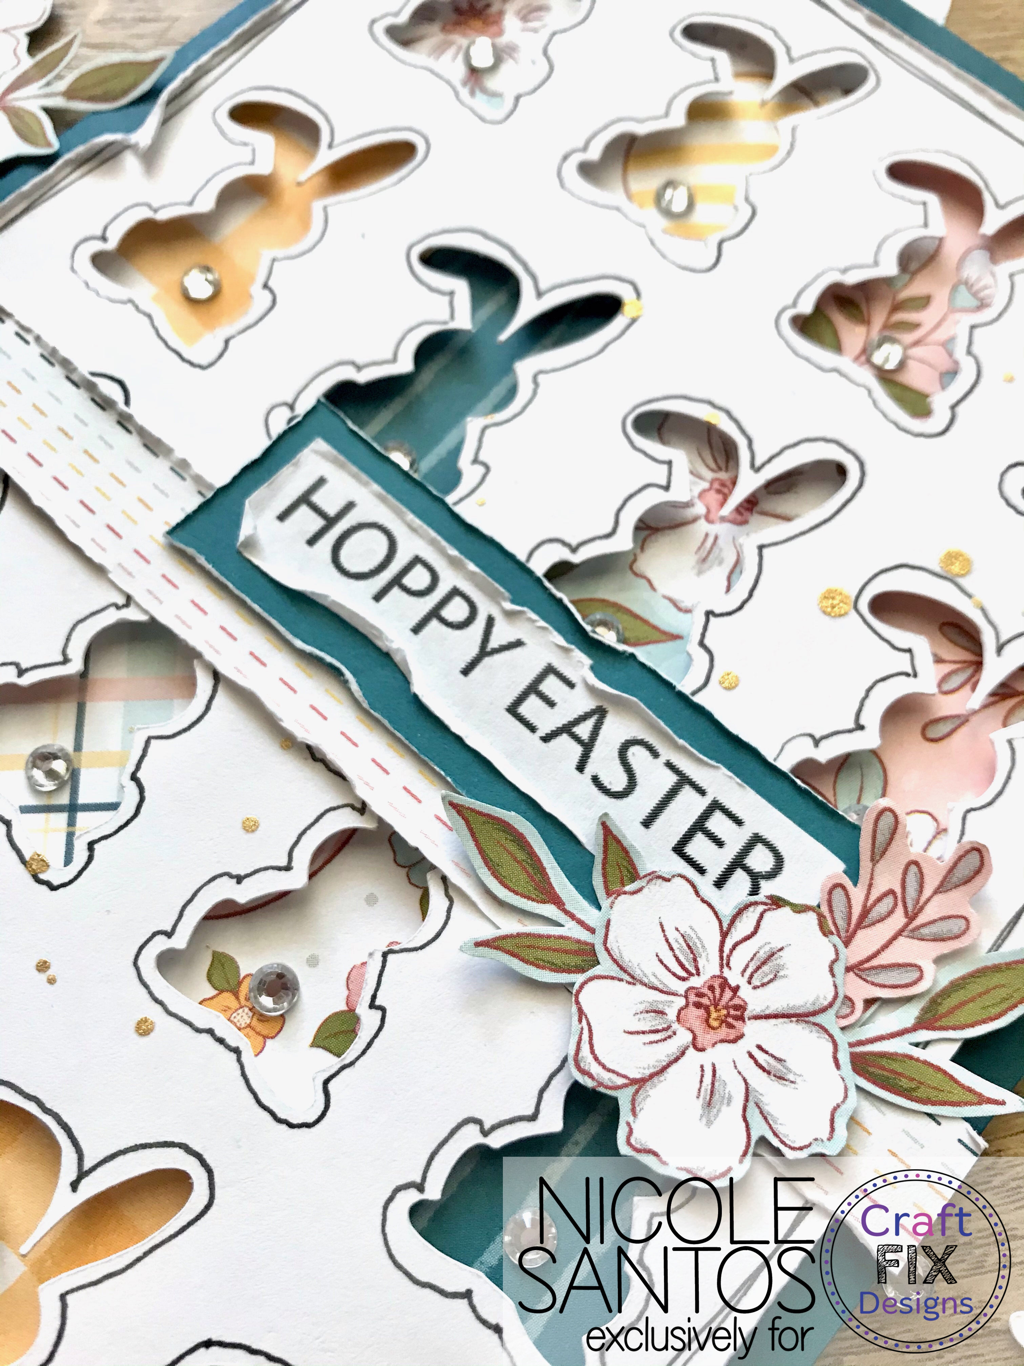 I then used the print and cut feature of my Cricket for the “Hoppy Easter” sentiment. I matted it with the same color card stock as my card, Peacock from Close to My Heart. I then fussy cut the flowers and leaves from the Daisy Meadows patterned papers and arranged around the sentiment. 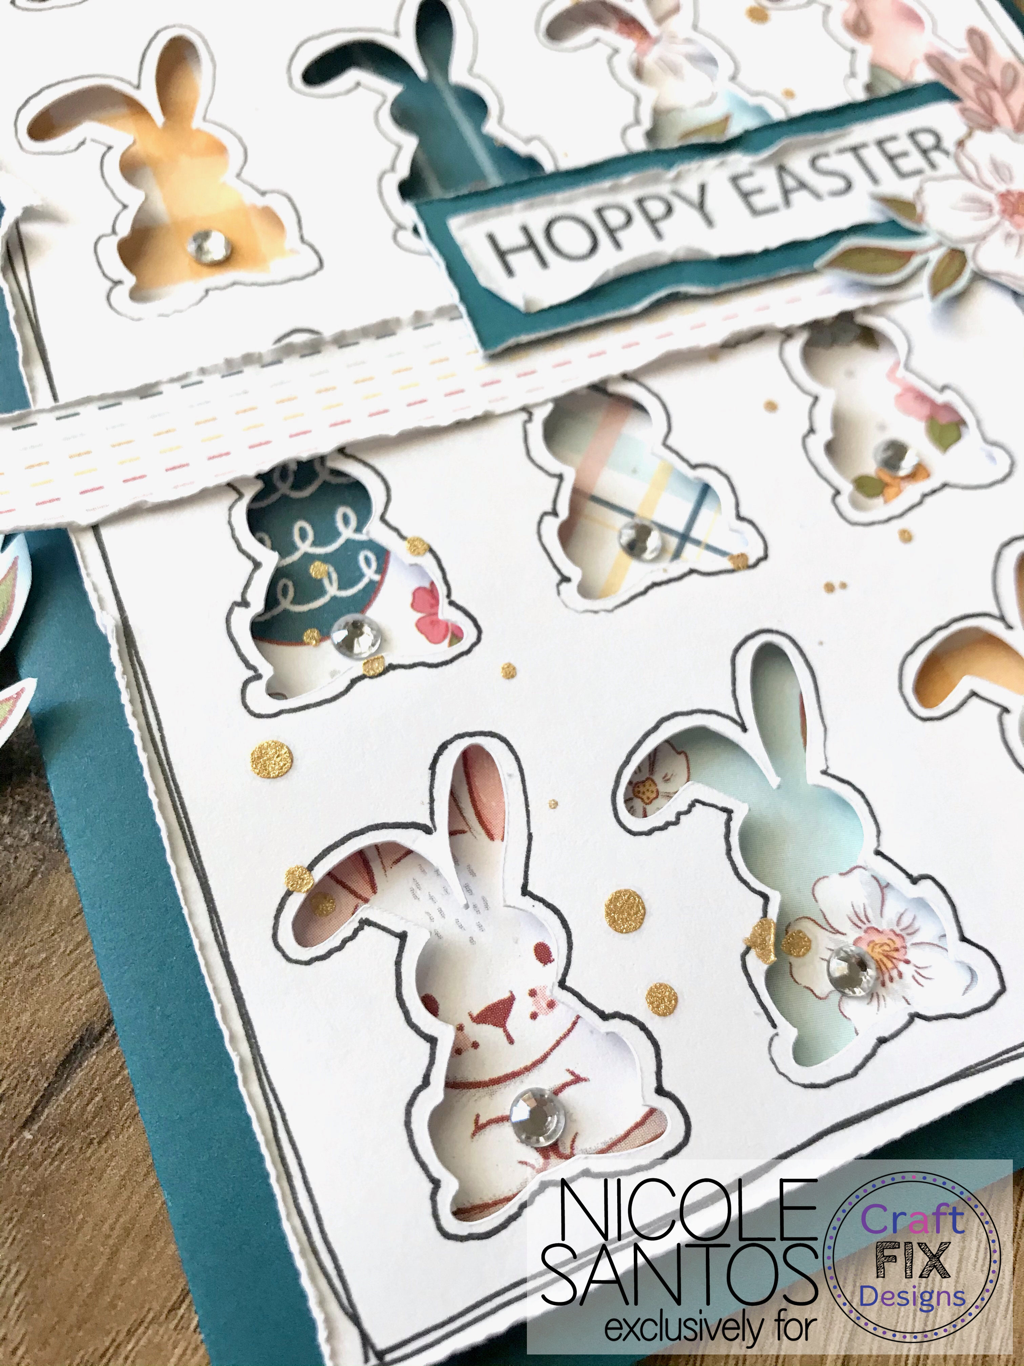 To finish my card I splattered gold from my Jen Hadfield Gold Spray all over the card. I attached to my Peacock card and it’s ready to be mailed to somebunny special!
Thank you for popping on to read about this cute card, I hope it inspires you to get crafty too. You can find the links to the products I used below. Craft Fix Designs Bunny Greeting Card (use code BUNNYHOP for 25% off your entire order until 3/19!!!): https://craftfixdesigns.com/collections/greeting-cards/products/bunny-5-x-7-greeting-card-with-multiple-sentiments-and-accessories Close to My Heart Daisy Meadows collection: https://cuzwelovetoscrap.closetomyheart.com/retail/search.aspx?searchvalue=mar21 Close to My Heart Clear Sparkles: https://cuzwelovetoscrap.closetomyheart.com/Retail/Product.aspx?ItemID=9384&ci=6770 Jen Hadfield Gold Spray: https://notjustforboyskitclub.com/collections/mixed-media/products/gold-mist
0 Comments
Leave a Reply. |

Shaker ElementHello all! I am currently working on a mini album of a snow play trip we took in January. I wanted to put all kinds of different elements into it so I thought it would be a perfect time to add a shaker box. So first off I decided to use a snowflake cut file from The Cut Shoppe for this element and the first thing I did was cut some of the inside elements out to make the visible area bigger. Then I glued a piece of scrap page cover to the snowflake. I glued a bigger piece and once it was dry I then cut it down to just my shaker area. I then cut my foam dots in half to box it in.
So my snowflake is ready for my dodads! First I placed my snowflake on top of where I wanted it and took a mental note of where the shaker part would be. Then I placed a little pile of sequins and confetti where it will go.
I then pulled all those little backings off my foam dots and placed my snowflake where is supposed to go and viola, I had a beautiful little shaker snowflake! I hope you enjoyed this tutorial, please let me know in the comments if there is something you would like to learn for scrapbooking!
Archives
April 2023
Categories
All
|


 RSS Feed
