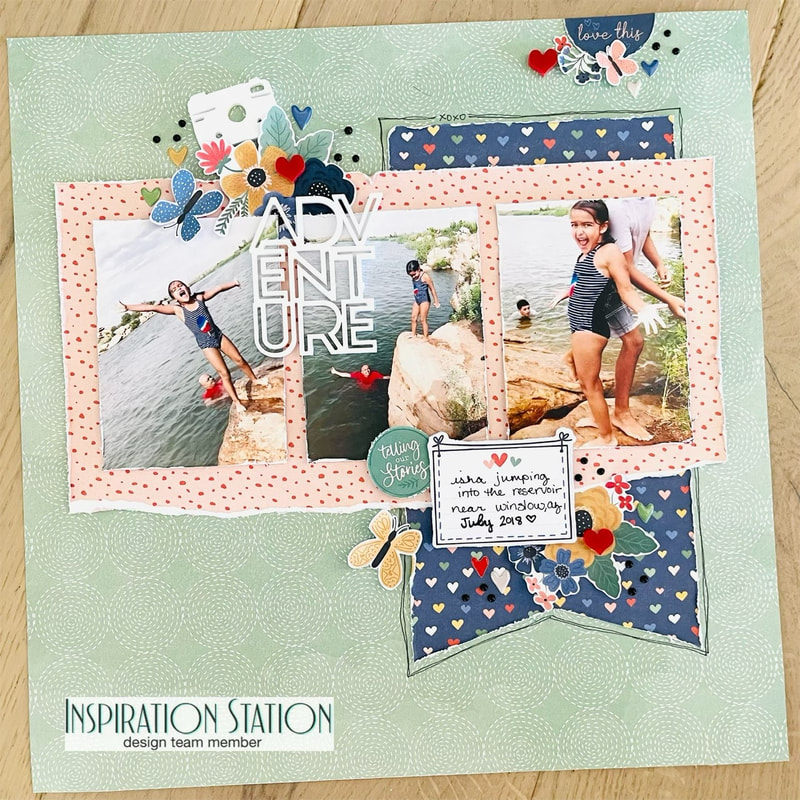
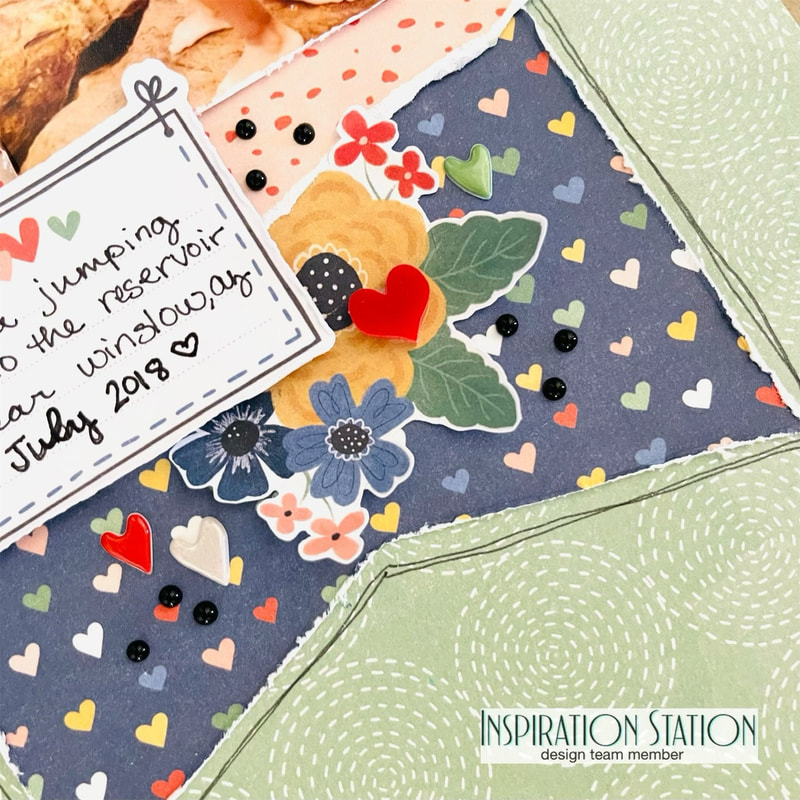
 Hello all, today I am sharing my second project of the month for the Inspiration Station Blog. Inspiration Station is a blog that inspires you to create with an everyday picture as the inspiration. You can then upload your project for a chance to win a prize. This is the picture for this sessions post: 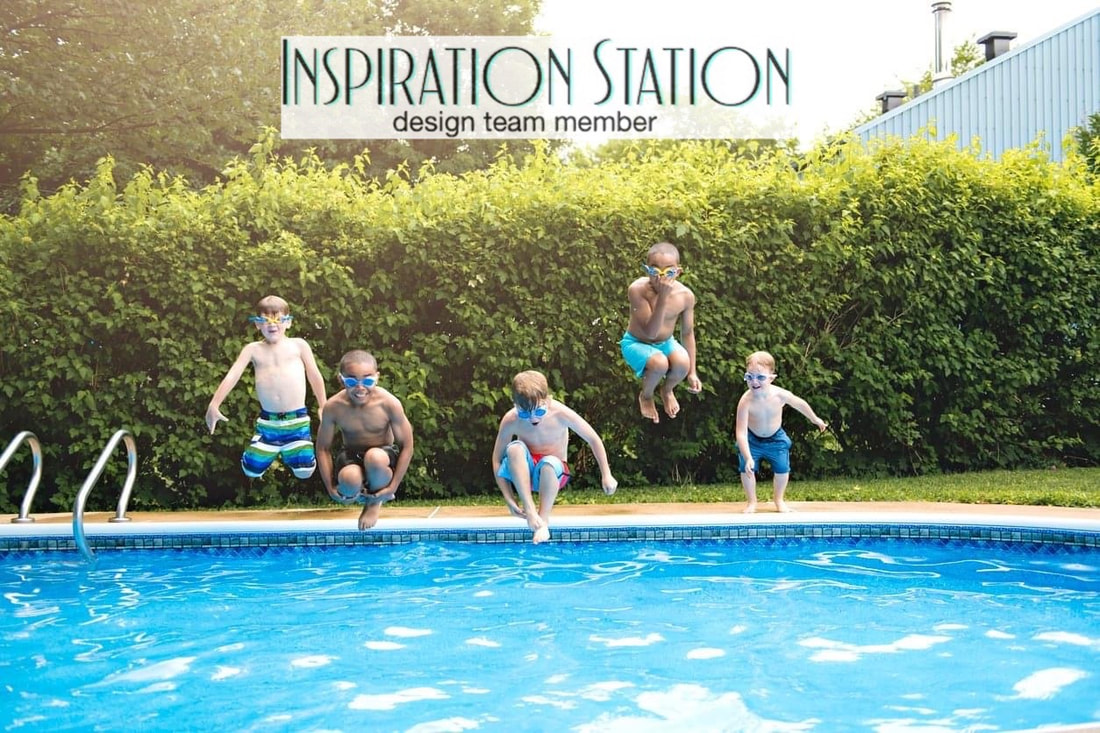 The first thing I did for this project was my paper piecing. I decided to go with the gorgeous Storyteller collection from Cocoa Vanilla Studio to make my page, trying to stick with blue's and greens like the inspiration photo. I also went with a swimming memory to go with the theme of the inspiration photo as well. I also knew that I wanted to use the little acrylic piece that says "ADVENTURE" from Bramble Fox so I made sure to add it while paper piecing. 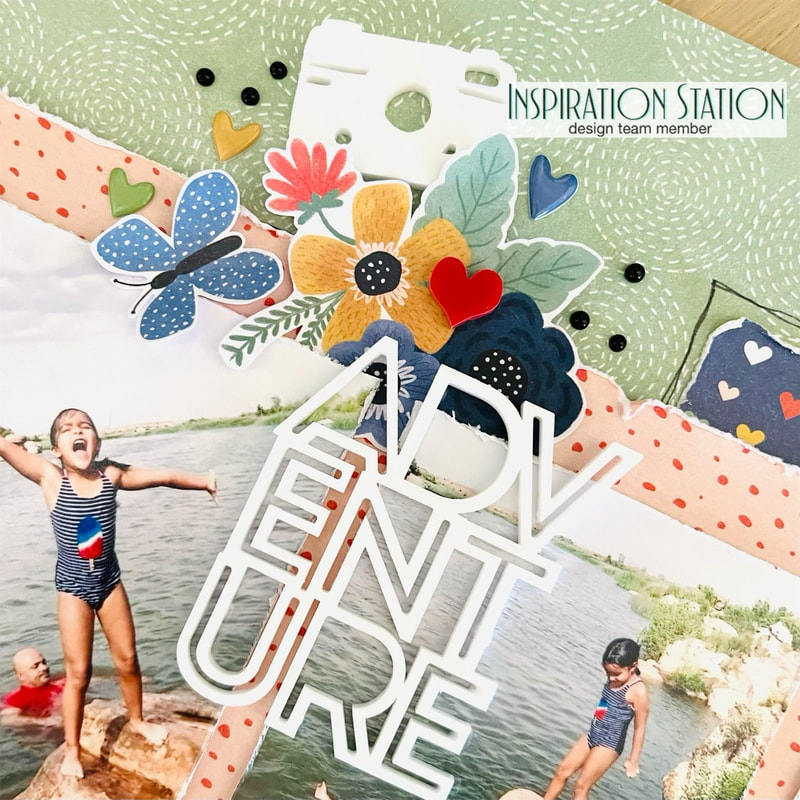 After I had everything where I wanted it to go I started to build my clusters in a set of 3 on my page making sure to used florals and a red heart from Bramble Fox in all of them. I'm so glad that you stopped by to read about my layout today! Be sure to jump on over to the Inspiration Station and get your project entered for a chance to win a prize!
Until next time, Nicole
1 Comment
8/15/2022 04:12:11 am
Nicole, I always look forward to your memory pages and this one is great and a wonderul interpretaion of the photo. Thanks for another wonderful team project for The Inspiration Station. Leave a Reply. |

Shaker ElementHello all! I am currently working on a mini album of a snow play trip we took in January. I wanted to put all kinds of different elements into it so I thought it would be a perfect time to add a shaker box. So first off I decided to use a snowflake cut file from The Cut Shoppe for this element and the first thing I did was cut some of the inside elements out to make the visible area bigger. Then I glued a piece of scrap page cover to the snowflake. I glued a bigger piece and once it was dry I then cut it down to just my shaker area. I then cut my foam dots in half to box it in.
So my snowflake is ready for my dodads! First I placed my snowflake on top of where I wanted it and took a mental note of where the shaker part would be. Then I placed a little pile of sequins and confetti where it will go.
I then pulled all those little backings off my foam dots and placed my snowflake where is supposed to go and viola, I had a beautiful little shaker snowflake! I hope you enjoyed this tutorial, please let me know in the comments if there is something you would like to learn for scrapbooking!
Archives
April 2023
Categories
All
|


 RSS Feed
